How to Connect APIParser to OpenAI API for Text-to-Image Generation
Introduction
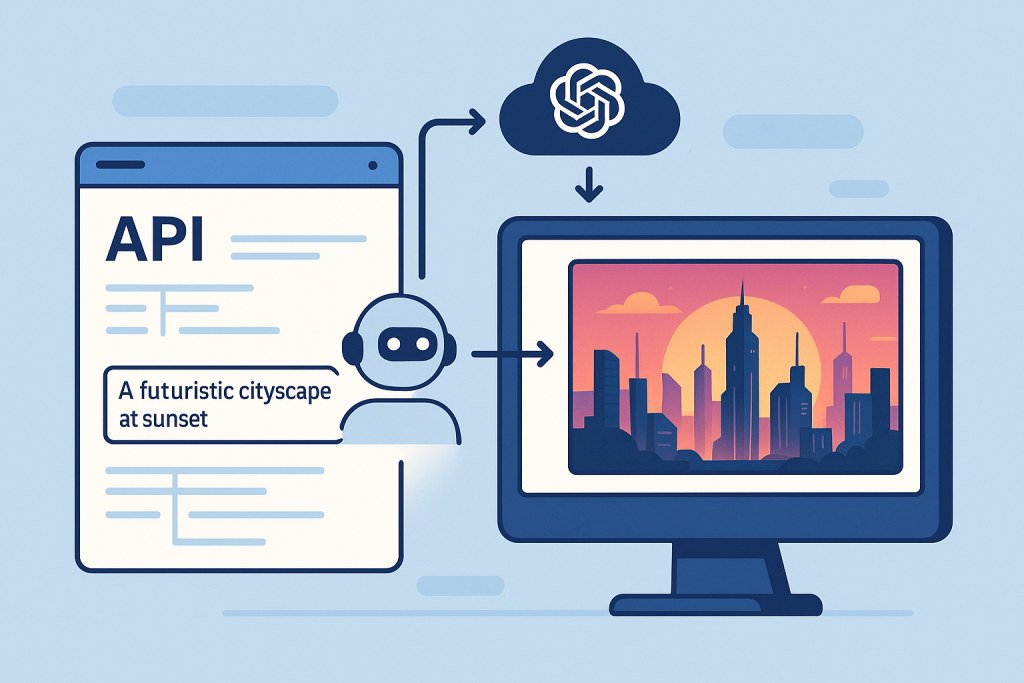
In today’s fast-paced digital world, the ability to generate engaging, high-quality images from simple text prompts can save enormous amounts of time and spark new levels of creativity. AI-powered text-to-image generation, such as that offered by OpenAI’s DALL·E models, is revolutionizing marketing, design, social media, and even research. However, leveraging these APIs typically requires technical expertise, coding, and manual integration work—unless you use a tool like APIParser.
APIParser is a powerful platform that bridges the gap between complex APIs and the tools you use every day, like Google Sheets or internal dashboards. In this comprehensive guide, we’ll walk you step by step through connecting APIParser to OpenAI’s text-to-image generation API, so you can turn your creative ideas into stunning visuals—without writing a single line of code.
By the end of this article, you’ll know:
- What APIParser and the OpenAI API are, and why integrating them is valuable.
- Exactly how to set up and authenticate your connection.
- How to structure requests and automate image generation from text prompts.
- Tips, tricks, troubleshooting, and advanced workflow ideas.
Let’s get started!
Table of Contents
- Why Use Text-to-Image Generation?
- What Is APIParser?
- Getting Started: Prerequisites
- Step-by-Step: Connecting APIParser to OpenAI API
- Practical Use Cases
- Advanced Tips and Best Practices
- Troubleshooting and FAQ
- Conclusion
Why Use Text-to-Image Generation?
Imagine describing a scene in words and instantly receiving a high-quality, AI-generated image that matches your vision. This is no longer science fiction—OpenAI’s DALL·E models and similar tools can now create artwork, illustrations, product photos, and concept visuals directly from a text prompt.
Who benefits?
- Marketers: Instantly create unique visuals for campaigns, social media, and blogs.
- Designers: Prototype concepts without a graphic artist.
- Content Creators: Bring stories, presentations, and educational material to life.
- Researchers and Developers: Generate data, test UI ideas, or explore creative AI.
The challenge? These capabilities are usually locked behind complex API endpoints and require scripting or app development skills. That’s where APIParser steps in.
What Is APIParser?
APIParser is an automation platform designed to connect APIs to the tools you already use. Its primary benefits are:
- No-Code/Low-Code: Connect to any API (like OpenAI) without writing scripts.
- Integration with Google Sheets: Run API calls directly from cells, automating data workflows.
- Custom Dashboards: Create front-ends that interact with external APIs.
- Automation: Schedule, parse, and transform data effortlessly.
For anyone who wants to leverage powerful APIs—especially AI/ML APIs—APIParser makes things drastically simpler, faster, and less error-prone.
Getting Started: Prerequisites
Before you connect APIParser to OpenAI, make sure you have:
- OpenAI Account and API Key:
Sign up at OpenAI’s platform if you haven’t already. You’ll need an API key to authenticate requests. - APIParser Account:
Sign up or log in at APIParser (or install the Google Sheets add-on if you plan to work in Sheets). - A project or spreadsheet where you want to use the integration.
Step-by-Step: Connecting APIParser to OpenAI API
Let’s go through the integration process, from obtaining credentials to generating your first image.
a. Getting Your OpenAI API Key
- Log in to your OpenAI dashboard.
- Navigate to the API Keys section (usually under your account settings or sidebar).
- Click “Create new secret key”.
- Copy the key and store it securely—treat it like a password.
- If you lose it, you can always create a new one.
Tip: For security, never share your API key in public forums, GitHub repos, or with anyone you don’t trust.
b. Setting Up Your API Request in APIParser
Whether you’re using the APIParser web app, dashboard, or Google Sheets add-on, the process is similar:
1. Add a New API Connection
- Click “Add New Request”, “Create Request,” or a similar button.
- Give your request a name like “OpenAI Text-to-Image”.
2. Enter the API Endpoint URL
For text-to-image with DALL·E:
bashCopyEdithttps://api.openai.com/v1/images/generations
(If using other OpenAI endpoints, consult their API documentation).
3. Select the HTTP Method
Choose POST since you’re sending a prompt and parameters to OpenAI.
c. Configuring Headers and Body
Headers
- Authorization:
Bearer YOUR_OPENAI_API_KEY(replace with your actual key). - Content-Type:
application/json
In APIParser, you typically add headers in a dedicated section—just click “Add Header” and fill in the fields.
Request Body
Here’s a sample JSON body for a basic image request:
jsonCopyEdit{
  "model": "dall-e-3",
  "prompt": "A surreal landscape with floating islands and waterfalls",
  "n": 1,
  "size": "1024x1024"
}
Fields explained:
- model:
"dall-e-3"(as of 2024, the most advanced model for image generation). - prompt: Describe your desired image in natural language.
- n: Number of images to generate (usually 1-4).
- size: Resolution; options are typically
"256x256","512x512","1024x1024"(higher resolutions use more credits).
Dynamic Prompts with APIParser
Want to generate images from cell values (in Google Sheets)?
Use variables/placeholders in your request body, like:
jsonCopyEdit{
  "model": "dall-e-3",
  "prompt": "{{A2}}",
  "n": 1,
  "size": "1024x1024"
}
Now, APIParser will use the text in cell A2 as your prompt!
d. Testing Your Integration
- Click “Test Request” in APIParser.
- If configured correctly, you’ll receive a response with image data—usually an array of image URLs.
- Check for errors. Common issues include:
- Invalid API key
- Exceeded quota
- Malformed JSON in body
- Missing or incorrect headers
Sample Response:
jsonCopyEdit{
  "data": [
    {
      "url": "https://oaidalleapiprodscus.blob.core.windows.net/private/..."
    }
  ]
}
- Save your request once it’s working.
e. Automating and Using Responses
In Google Sheets
- Use APIParser’s formulas to call the endpoint with different prompts in each row.
- Extract the image URL from the response JSON into a cell.
- Use Sheets formulas (like
=IMAGE()) to display the generated image in your spreadsheet.
Example:
- A2: “A cat riding a bicycle in Paris”
- B2: APIParser formula triggers the OpenAI image generation.
- C2: Extracted URL is displayed as an image using
=IMAGE(C2).
In Custom Dashboards or No-Code Tools
- APIParser can push responses to web dashboards, internal tools, or connect with Zapier/Make for more automation.
- Schedule requests, process batches, or trigger image generation from form inputs.
Practical Use Cases
Here are real-world scenarios where this integration shines:
1. Social Media Marketing
Create hundreds of unique, on-brand visuals for posts or ads—automatically, based on campaign data.
2. Product Mockups
Describe new product ideas and generate concept images for quick stakeholder feedback.
3. Blogging and Content Creation
Instantly illustrate articles with custom AI-generated images, matching your topic perfectly.
4. Education and E-Learning
Make lessons visually engaging by generating relevant images from lesson titles or descriptions.
5. Rapid Prototyping
Designers and product managers can visualize features, UIs, or app concepts from simple prompts.
6. Research and Data Augmentation
Researchers can quickly create datasets of images for experiments, simulations, or presentations.
Advanced Tips and Best Practices
1. Parameter Tuning
Experiment with prompt detail, image size, and the number of images to optimize quality and cost. Sometimes, longer prompts yield better images; other times, brevity works best.
2. Automation
- Batch Generation: Use APIParser to loop through a list of prompts in Sheets, generating many images at once.
- Scheduling: Automate image creation for daily/weekly reports or posts.
- Workflow Integration: Combine with other APIs (e.g., text summarization, translation) for richer automation.
3. Error Handling
APIParser lets you set up notifications or fallback logic if an API request fails—helpful if you hit rate limits or have invalid prompts.
4. API Cost Management
Keep an eye on usage in your OpenAI dashboard. Image generation can use up credits quickly, especially with high-resolution images or large batch requests.
5. Data Security
Never expose your API keys. Store them in environment variables, APIParser’s secure vault, or restrict access to trusted collaborators only.
Troubleshooting and FAQ
Q: My API request fails with “Invalid API key.”
A: Double-check you’re using the latest OpenAI API key and that you didn’t copy extra spaces.
Q: The response is empty or has errors.
A: Review the prompt for unsupported content (e.g., copyrighted or inappropriate requests) and check that your JSON is properly formatted.
Q: How do I extract just the image URL from the response?
A: Use APIParser’s response parsing tools or, in Sheets, formulas like =JSONPATH() to select the data[0].url field.
Q: Can I generate multiple images at once?
A: Yes, set "n": 2 (or more) in your request body. The response will include an array of image URLs.
Q: Is there a way to automate image downloads?
A: Yes! Use Google Apps Script or a no-code automation tool like Zapier to fetch and save images to Google Drive or Dropbox.
Q: What if I reach my OpenAI quota?
A: The API will return a quota error. Set up alerts in APIParser, or monitor your OpenAI dashboard for usage.
Conclusion
The combination of OpenAI’s world-class AI models and APIParser’s no-code integration platform unlocks unprecedented creative power for individuals and teams. Whether you’re a marketer seeking new visuals, an educator looking to engage students, or a product manager prototyping new ideas, this workflow saves hours of manual work and sparks entirely new possibilities.
With just a few simple steps, you can go from text to stunning AI-generated images—directly inside Google Sheets, dashboards, or your favorite tools.
Ready to try it?
- Sign up for APIParser
- Grab your OpenAI API key
- Start creating today!
Further Reading
- How to Use APIParser with Google Sheets: Beginner’s Guide
- 10 Creative Uses for AI-Generated Images in Your Business
- Best Practices for Managing API Keys and Security
- Automating Marketing Workflows with APIParser and AI APIs